We finished our documentation and video on time, however, we had technical difficulties with the video. We had all the footage and finished editing, but somehow when we rendered the video, the quality was not great. We had to re-do all the editing all over again, but after a sleepless night for Jonathan, we were able to pull it off.
Wednesday, December 15, 2010
Presentation + Documentary
Our presentation definitely did not go as well as we hoped it would. The calibration done on the lights over the weekend had to be re-calibrated as the air conditioner in the room turned on, changing the electrostatic field. However, if we had more time, we would use motion sensors and lower decibel servo motors for this installation.
Tuesday, December 14, 2010
Final Preesntation
Over the past few days, we have been in the Green Screen Room as much as we can. We have been setting up, and all the lights have been hung up. However, during calibration, we realized that our sensors could not touch anything that was conductive, or had electricity running through it. We had to re-wire everything in order to have proper calibration. Even though we straightened everything out, we realized the electrostatic field in the Green Screen room fluxuates a lot. Any change in the environment would require us to re-calibrate the lights.
In order to see the shimmering effect on the floor, we had to purchase a white cloth to put on the floor. However, we could not find a big enough one, so we tiled 2 cloths.
If we had more time, we would switch to motion tracking sensors and lower decibel servo motors.
In order to see the shimmering effect on the floor, we had to purchase a white cloth to put on the floor. However, we could not find a big enough one, so we tiled 2 cloths.
If we had more time, we would switch to motion tracking sensors and lower decibel servo motors.
Friday, December 10, 2010
Further Improvements
Today, we decided to spray paint our lights. We purchased matte white spray paint, and painted all the lights. The effect was what we wanted. We wanted to have lights that were more concentrated without letting out too much light.
 The servo motors are all placed into a self-made foam box, and ready to be hung up.


Thursday, December 9, 2010
Final Project Update - Green Screen Room
Today, we finally had access to the Green Screen Room. We tested out our lights, but there are lots more to be done. We were able to silence our servo motor, but we have encountered more problems. The AC in the Green Screen Room is not clean. As a result, we have had dirty feedback, not allowing our lights to sense the way we want them to. We will have to further test our lights and calibrate them.
We were able to bring in four 2' x 4' plywood into the Green Screen Room and we hung them up on the ceiling, which were supported by the bars. The plywood is used for support for our Shimmering Lights. We did a trial run and it looks good, however, we still need to calibrate our sensors.

We were able to bring in four 2' x 4' plywood into the Green Screen Room and we hung them up on the ceiling, which were supported by the bars. The plywood is used for support for our Shimmering Lights. We did a trial run and it looks good, however, we still need to calibrate our sensors.

Saturday, December 4, 2010
Shimmering Light Update
We began to test our prototype in the Green Screen Room. We tested out the lighting in the room and figured out how high we would want to hang our lights and how far apart.


We came up with a method to try to silence our servo motor. We surrounded the servo motor with foam and put it in a box.
 We also began to test our pressure sensor mat. We are thinking of using two pieces of cardboard with foam inside, to make the pressure sensor.


Monday, November 29, 2010
Final Project - update
Because we started our Final Project during sketch 2, this will just be a quick update. We have some schematics here to better understand how our Shimmering Lights will work.


We talked with Jinsil and Greg about how our setup will be. We booked the Green Screen Space for next week for a quick demonstration, as well as the week after for our final presentation. We discussed how we can solve our servo motor noise problem, and we will further work things out. After the lab today, we went to the Green Screen room and did some quick testing. We tested out how high above ground we would want to hang the lights, as well as how far apart we want to put them. We will start on making the pressure sensor soon.
Tuesday, November 23, 2010
Shimmering Light - Sketch 2 Presentation
From the last update, we started making the prototypes of Shimmering Lights. We gathered all the materials, starting one thing at a time. For this week, we decided to make 4 of the 8 Shimmering Lights for the final installation. We chose to use acrylic tubing, and laser cut the caps.
 Inside each Shimmering Light contains 3 LEDs which are soldered onto resistors.


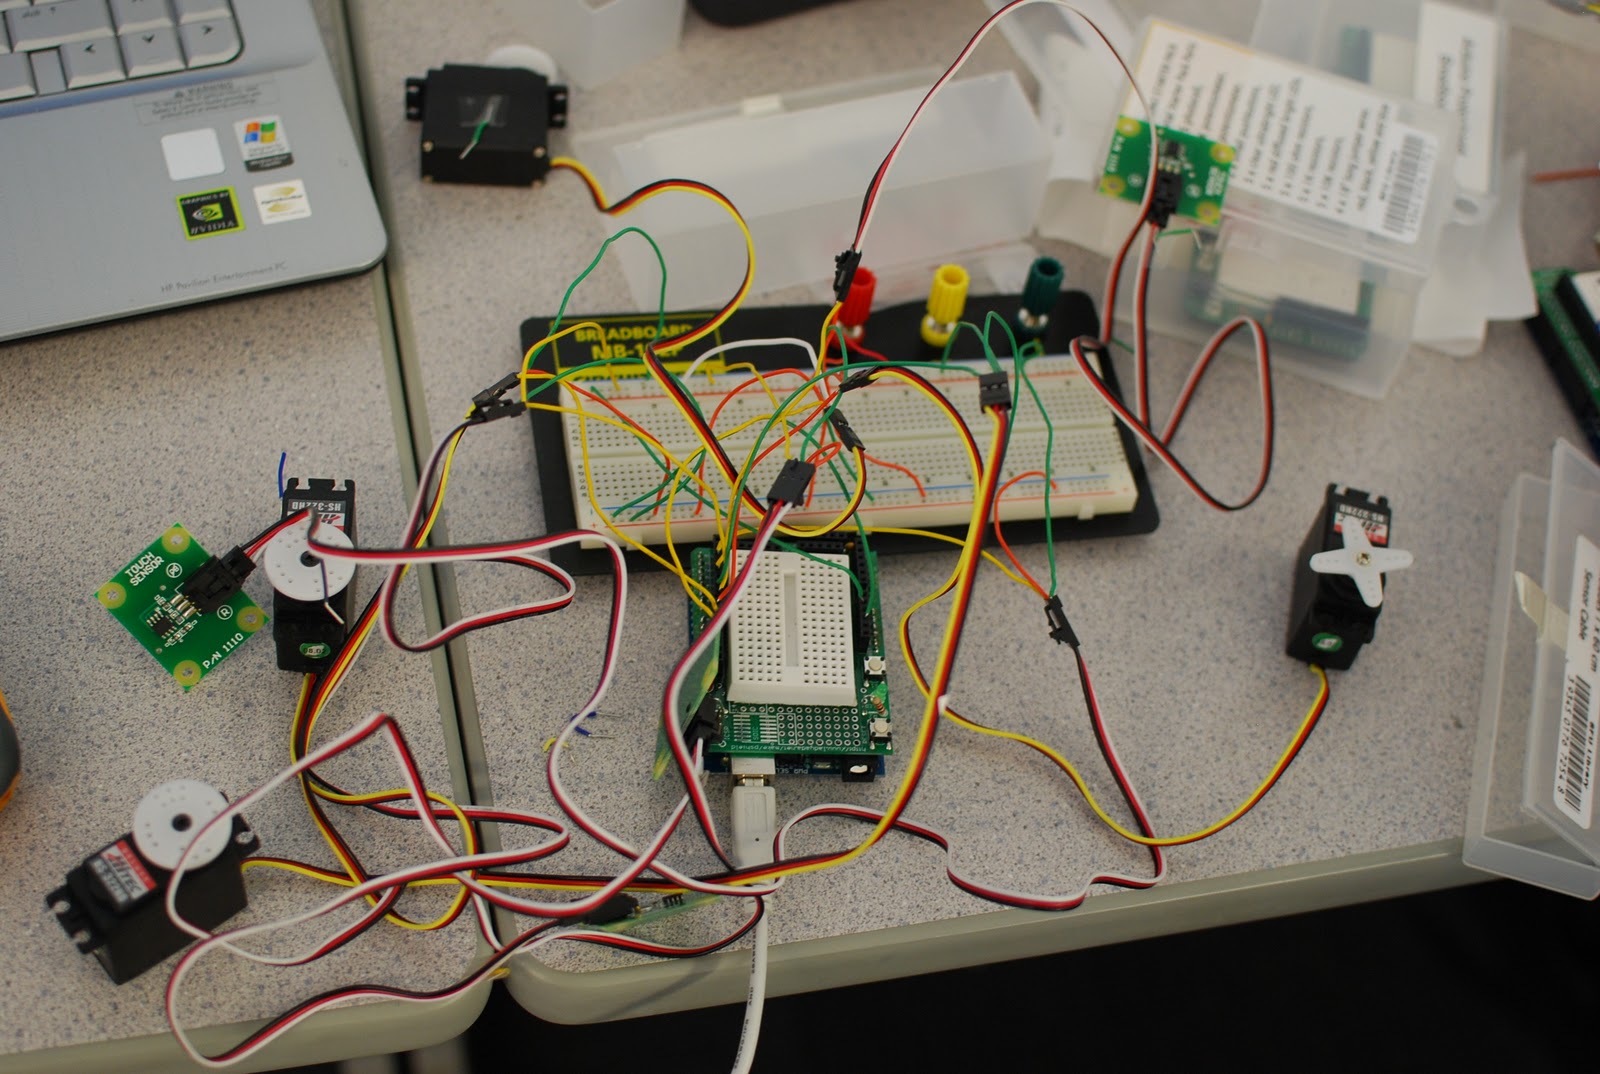
After all the physical aspects were accomplished, we went on with the technical part. We connected 2 Arduino boards with 4 touch senors controlling 4 servo motors.


 As users walk through the installation, the Shimmering Lights will evolve around the users. The closer the user gets to the lights, the brighter the lights will get. We also incorporated a mood changing effect on the Shimmering Lights, changing colors depending on users mood.

 We ran into a couple of technical difficulties. After everything worked, we uploaded our code onto an Arduino board. However, we were getting random results and were not as accurate as before. It took us a very long time to isolate the problem by removing and changing out parts one at a time. In the end, we found out that we had purchased a faulty Arduino board. With the time we spent figuring out the problem, we would have built a frame where the lights would hang from, to show the Shimmering Light effect as well as how it would look from above. However, this was not completed due to time constraints. We also realize that our servo motor is really loud, and we will be addressing our issues to make the final project perfect.


It took us a long time to do coding as it is not our forte. However, with modified code and GSR sensor, we created a Shimmering Light prototype that gets the message across for now.


Subscribe to:
Posts (Atom)